









Baby Bottle Sterilizer Guide for Busy Parents
A 2 a.m. feeding is not the moment to discover that every clean bottle is still drying on the counter. A baby bottle sterilizer can cut down the daily scramble by treating bottles, nipples, pump parts, and pacifiers in one dedicated cycle. The right model does not need to be fancy. It needs to fit your feeding routine, your counter space, and the parts you actually use.
For many families, sterilizing is about extra reassurance during the early months, especially when a baby is under three months old, was born prematurely, or has a weakened immune system. It is also a practical way to keep a rotating supply of feeding gear ready without boiling a pot of water every day. The key is choosing a method you will use correctly and consistently.
What a Baby Bottle Sterilizer Actually Does
A sterilizer uses high heat or ultraviolet light to reduce germs on feeding equipment after it has been thoroughly washed. That last part matters. Milk residue, formula film, and trapped water inside nipple rings need to be cleaned off first. A sterilizer is not a substitute for washing bottles with hot, soapy water and a dedicated bottle brush.
Think of the process as two separate jobs. Washing removes visible residue and grease. Sterilizing provides an added hygiene step for clean items. Skipping the wash cycle can leave behind buildup that no machine can magically fix.
Most bottle sterilizers handle more than bottles. Depending on the design, you may be able to sanitize nipples, caps, breast pump components, teething toys, and pacifiers. Always check the care label on each item first. Some materials are not designed for high heat, while certain UV units may have size or placement limits.
The Main Types of Bottle Sterilizers
There is no single best option for every household. A countertop steam machine works well for parents who want high capacity, while a microwave unit can make more sense in a small kitchen or for travel. Start with how many bottles move through your day.
Electric steam sterilizers
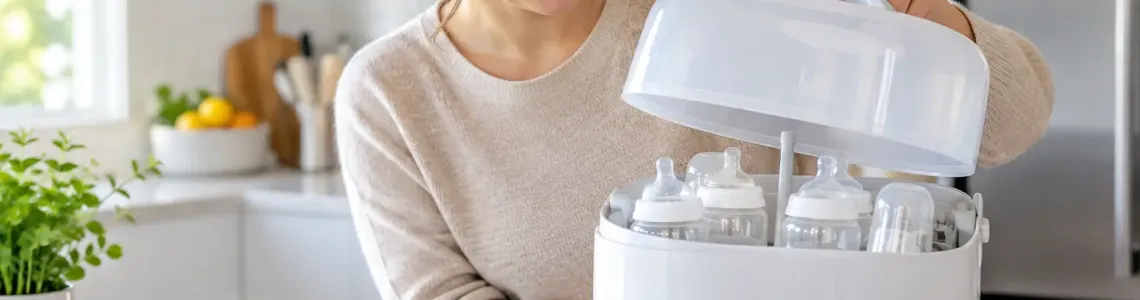
Electric steam sterilizers are the most hands-off choice. Add the required amount of water, load the clean parts, close the lid, and start the cycle. Steam reaches the items inside without the need to monitor a boiling pot.
These machines are a strong fit for families using multiple bottles each day, pumping regularly, or caring for twins. Larger units can often hold several bottles and accessories at once. Some also dry the contents afterward, which can be a real time-saver when counter space is limited.
The trade-off is size and maintenance. A steam sterilizer takes up room, needs electricity, and may develop mineral scale if you have hard water. Empty it after use and descale it as directed so the heating plate continues to work properly.
Microwave steam sterilizers
Microwave sterilizers are compact containers that use steam generated from water inside the unit. They are usually faster and less expensive than electric models, making them useful for small households, occasional use, or visits to family.
They do require a microwave that fits the unit, and you must be careful when opening the lid. Steam burns happen fast. Let the container stand for the recommended time, open it away from your face, and use clean hands or tongs when removing parts.
UV sterilizers
UV sterilizers use ultraviolet light rather than steam. Many models also offer drying functions, so they can appeal to parents who do not want damp parts sitting in a machine after a cycle.
They are useful for items that may not tolerate high heat, but they demand more careful loading. UV light only works where it can reach, so bottles and accessories should not block one another. The interior also needs to stay clean, and bulbs or LEDs must be maintained according to the manufacturer’s instructions. UV machines are often the higher-cost option, so they make the most sense when their drying and multipurpose storage features solve a real daily problem.
Boiling and sterilizing bags
A large pot of boiling water is the low-cost, no-appliance route. It can be effective for heat-safe bottle parts, but it requires supervision and can wear some items faster over time. A microwave sterilizing bag is another compact option for parents who want a simple backup method.
These methods are practical, but they are less convenient when you are washing and preparing bottles several times a day. If the routine feels like a chore, an electric unit may earn its counter space.
How to Choose the Right Baby Bottle Sterilizer
Do not buy based on bottle capacity alone. A machine that claims to hold six bottles may fit far fewer once you add wide-neck bottles, pump flanges, valves, nipples, and caps. Look at the full mix of gear you clean after a normal day.
A good choice should match these everyday details:
- Your bottle style: Narrow, wide-neck, angled, glass, and anti-colic bottles take up space differently.
- Your feeding volume: Exclusive pumping and formula feeding often create more daily washing than occasional bottle use.
- Drying needs: A drying cycle can reduce the need for towels, racks, and damp parts on the counter.
- Available space: Measure the counter area, cabinet height, and microwave before ordering.
- Cleaning effort: Removable trays and simple layouts are easier to rinse, wipe, and descale.
Also consider your household’s backup plan. A dedicated electric sterilizer is convenient until there is a power outage, you travel, or the machine needs cleaning. Keeping a heat-safe pot or a compact microwave option available can prevent a stressful last-minute scramble.
A Safer Daily Bottle-Care Routine
The simplest routine is the one that avoids leaving milk residue to dry. After each feed, take the bottle apart completely. Rinse it, then wash every piece with hot, soapy water using clean brushes reserved for feeding items. A dishwasher may be suitable for dishwasher-safe parts, but place small components in a closed basket so they do not disappear into the rack.
Once washed, place items in the sterilizer without overcrowding. Steam and UV both need access to the surfaces being treated. If bottles are stacked too tightly or nipples are tucked inside caps, the cycle may not work as intended.
After sterilizing, let parts dry in the machine if it has a drying setting, or transfer them to a clean drying rack. Avoid drying bottles with a kitchen towel. Towels can carry moisture, food residue, and everyday kitchen germs. If you need to handle items before they are fully dry, wash your hands first and touch as little of the feeding surface as possible.
You do not need to sterilize indefinitely for every healthy older baby. Needs can change as your child grows, starts putting toys in their mouth, and builds a more varied routine. If your baby has specific health needs, ask your pediatrician how often to sterilize bottles and pump parts.
Common Mistakes That Waste Time
The biggest mistake is treating sterilization as a replacement for cleaning. A cloudy bottle or sticky nipple needs washing first, no exceptions. Another common issue is using too much or too little water in a steam unit. Follow the fill line or instructions exactly. Too little water can stop the cycle early, while too much can leave excess water where you do not want it.
Parents also sometimes leave sterilized items inside a closed machine for long periods and assume they remain protected forever. A closed unit can be a cleaner storage spot than an open counter, but it is not a permanent sterile vault. If parts are exposed, handled, or stored for a while, use sound judgment and rewash or resterilize when needed.
Finally, do not ignore maintenance. Mineral buildup on a steam plate can slow heating and leave white deposits. Clean the unit on schedule, use the manufacturer-approved descaling method, and wipe down trays and lids. A clean sterilizer supports clean bottles.
Make Bottle Prep Easier, Not More Complicated
The best baby-care tools remove friction from routines that repeat every day. If you regularly find yourself boiling water, hunting for dry nipples, or washing the same parts in small batches, a bottle sterilizer with enough capacity and a drying function can make feeding prep feel far more manageable.
Choose the setup that keeps clean bottles ready when your baby is hungry, then give the machine the same basic care you give the rest of your kitchen. A few minutes of washing, proper loading, and regular descaling can turn one small appliance into a dependable part of a calmer feeding routine.