










-50x50.png "ClearWhite GlassRestore Pro | Polish Cermin Kereta | Car Glass Polish Watermark and Water Spot Remover | Polish Cermin Hadapan | Kesan Wiper")


-(1)-50x50.png "EziSac Lizard Repellent - Fast Acting Effective Natural Long-Lasting No Mess No Sticky Formula to Halau Cicak")

How to Clean Grout Lines Without Damaging Tile
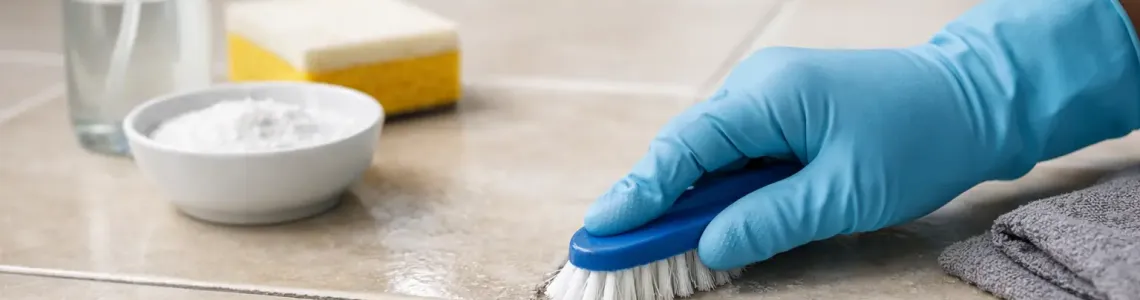
Grout can make a freshly mopped floor still look dirty. Those narrow lines trap soap residue, kitchen grease, muddy footprints, and shower moisture until white grout turns gray, yellow, or black. The good news: learning how to clean grout lines does not require expensive equipment or harsh chemicals for every job. The right cleaner, a little dwell time, and a proper brush can bring back a noticeably cleaner finish.
Start by Identifying What Is on the Grout
Not all grout discoloration needs the same treatment. On kitchen floors, the problem is often oily dirt that has settled into porous grout. In bathrooms, soap scum, mildew, and hard-water minerals are more likely. Near entryways, it may simply be tracked-in soil. Treating every stain with the strongest cleaner available can waste time and, in some cases, damage the grout or nearby tile.
A light gray film usually responds well to a pH-neutral tile cleaner or a mild dish soap solution. Dark spots in a shower may be mildew. Orange or rusty marks can point to mineral-heavy water. If the grout is cracked, powdery, or missing in places, cleaning alone will not restore it. Repair or regrout those areas before moisture gets behind the tile.
What You Need Before You Clean
Keep the process simple. Gather a vacuum or dry microfiber cloth, a grout brush or stiff nylon brush, a spray bottle, clean water, microfiber towels, and your chosen cleaning product. A small scrub brush gives better control than a large floor brush, especially around corners, fixtures, and textured tile.
Avoid steel wool, wire brushes, and highly abrasive scouring pads. They can scratch glazed tile and wear away the grout surface, making it even easier for future stains to stick. Use a nylon brush with firm bristles instead.
Wear gloves when using commercial cleaners, and open a window or run the bathroom exhaust fan. Never mix bleach with vinegar, ammonia, or any other cleaner. That combination can release dangerous fumes.
How to Clean Grout Lines Step by Step
Start by vacuuming or sweeping the floor. On a shower wall, rinse away loose hair and surface residue. Removing dry debris first keeps it from becoming gritty mud while you scrub.
Apply your cleaner directly to the grout lines, not across the entire tile surface. Let it sit for the time stated on the label, usually several minutes. This dwell time does much of the work by loosening buildup before you touch a brush. Do not let a cleaner dry completely on the tile.
Scrub in short sections using a stiff nylon grout brush. Work back and forth along the line with steady pressure. You do not need to attack the grout aggressively. A cleaner that has had time to work should lift grime with controlled scrubbing, not exhausting force.
Rinse thoroughly with clean water and wipe up the dirty liquid with a microfiber towel. On floors, change your rinse water often. Mopping with gray water can put the same grime right back into the grout. Inspect the area once it dries, because wet grout can look cleaner than it really is.
For a larger tiled floor, clean one small zone at a time. Spraying the entire room at once means the first areas may dry before you get back to them. Small sections also make it easier to see where stains are lifting and where a second application is needed.
For Everyday Dirt and Light Stains
A pH-neutral tile and grout cleaner is the safest starting point for regular cleaning. It is suitable for most ceramic and porcelain tile surfaces, cuts through ordinary soil, and is less likely to leave a residue. Spray, wait, brush, rinse, and dry.
A paste of baking soda and water can help with isolated spots, but it is not a replacement for a proper cleaner on greasy or heavily soiled grout. Use it gently and rinse well. Repeated heavy scrubbing with any gritty paste can dull some tile finishes over time.
For Soap Scum, Mildew, and Shower Grout
Bathroom grout needs moisture control as much as cleaning power. Use a bathroom or grout cleaner formulated to remove soap residue and mildew staining, then scrub and rinse. If mildew keeps returning, check that the exhaust fan runs long enough after showers and that water is not collecting in grout cracks or caulk gaps.
For stubborn mildew stains, a bleach-based grout cleaner may be appropriate on white or very light grout, provided the tile and grout manufacturer allows it. Use it sparingly, follow the label exactly, and rinse completely. Bleach can fade colored grout, weaken old grout with repeated use, and irritate skin and lungs.
For Greasy Kitchen Grout
Kitchen grout often needs a degreasing cleaner rather than a mildew product. Spray the cleaner onto the grout, allow it to break down the grease, then brush and rinse with warm water. Pay extra attention to the area in front of the stove, sink, and trash can, where invisible cooking oils tend to settle.
If you have been using an oily floor polish or too much cleaning solution, residue may be attracting more dirt. After deep cleaning, switch to the recommended dilution and avoid overloading the mop. More product does not always mean a cleaner floor.
When Vinegar Is a Bad Idea
Vinegar is often suggested for grout cleaning, but it is not a universal solution. Its acidity can damage natural stone such as marble, travertine, limestone, and some terrazzo surfaces. It may also gradually weaken unsealed cement-based grout. If you are not certain what your tile is made of, choose a pH-neutral cleaner instead.
Even on ceramic or porcelain tile, vinegar is better reserved for occasional mineral deposits, not every weekly clean. Never use it after a bleach product or at the same time as one. Rinse the area fully before changing cleaning products.
Tackle Deep Stains Without Ruining the Finish
If a first cleaning improves the grout but does not fully restore it, repeat the process before moving to stronger options. A second treatment with adequate dwell time is often safer and more effective than immediately reaching for a harsh chemical.
For deeply embedded stains, choose a grout-specific cleaner designed for the problem you have - grease, mineral buildup, mildew, or general soil. Test it in a hidden corner first, especially if the grout is colored or the tile has a matte, textured, or natural-stone finish. A targeted cleaner gives you more predictable results than random household chemical combinations.
Steam cleaners can also help loosen dirt from ceramic and porcelain tile grout, but use caution. Excessive heat or moisture can affect loose grout, damaged caulk, or tile with existing installation problems. Steam is a useful tool, not a fix for cracked grout or water intrusion.
Prevent Grout From Looking Dirty Again
Once the lines are clean, make the result last. Dry shower walls after use when possible, and run ventilation to reduce moisture. Wipe spills on kitchen and bathroom floors quickly, particularly coffee, sauces, hair dye, and pet accidents. These can stain porous grout faster than many people expect.
Use a pH-neutral cleaner for routine mopping and do not skip the rinse step if the product requires one. Dirt loves leftover detergent film. In high-traffic areas, a quick weekly grout brush around the dirtiest zones prevents the need for a major scrub later.
Sealing clean, fully dry grout is one of the most useful upgrades for cement-based grout. A quality grout sealer helps resist water and stains, but it is not permanent or completely stainproof. How often you need to reseal depends on traffic, cleaning habits, and whether the area is a wet shower, busy kitchen, or low-traffic wall.
Clean grout changes the whole room because it sharpens the look of every tile around it. Start with the mildest effective solution, give the product time to work, and make rinsing part of the job. That routine will keep your floors and showers looking cared for without turning tile maintenance into an all-day project.
Related Products
