









-50x50.png "ClearWhite GlassRestore Pro | Polish Cermin Kereta | Car Glass Polish Watermark and Water Spot Remover | Polish Cermin Hadapan | Kesan Wiper")


How to Clean Marble Floors Without Damage
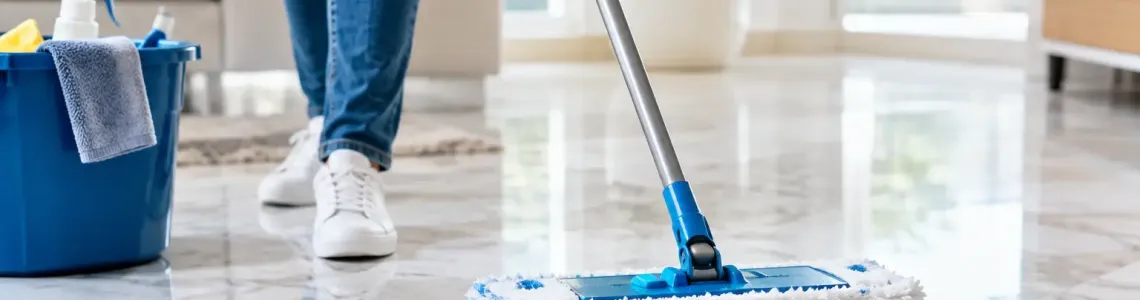
A marble floor can look spotless one minute and dull the next after the wrong cleaner leaves cloudy marks behind. Knowing how to clean marble floors is less about using stronger chemicals and more about preventing grit, moisture, and acids from damaging the finish. The good news: you do not need specialist equipment for everyday care. You need the right routine and a cleaner made for natural stone.
Why Marble Needs a Different Cleaning Routine
Marble is a calcium-based natural stone. That gives it its elegant veining and smooth finish, but it also makes it sensitive to acidic and abrasive products. Lemon juice, vinegar, bathroom descaler, and many all-purpose sprays can react with the surface and create etching - pale, dull, or rough-looking spots that are not ordinary stains.
A floor can also lose its shine from tiny scratches. Sand, pet litter, dirt tracked in from outside, and hard brush bristles act like sandpaper when they are pushed across the tile. This is why a clean-looking marble floor may still appear hazy over time.
The goal is simple: remove loose soil first, wash with a pH-neutral solution, use very little water, and dry the surface before mineral residue or footprints settle in.
What to Use to Clean Marble Floors
Start with a soft microfiber dust mop or vacuum that has a hard-floor setting and no rotating brush. For wet cleaning, use a clean microfiber mop and a pH-neutral stone or marble floor cleaner. These formulas lift everyday grime without the acid, bleach, or harsh alkalinity that can attack the stone or weaken its sealer.
Use cool or lukewarm water, not hot water. Hot water is not needed for regular floor cleaning and can make a product dry too quickly, leaving streaks if too much solution is used. A two-bucket setup is useful for larger rooms: one bucket for diluted cleaner and one for rinsing the mop. For smaller spaces, a spray mop with a stone-safe cleaner gives better control over moisture.
Avoid the following products on marble floors:
- Vinegar, lemon juice, and citrus-based cleaners
- Bleach, ammonia, and heavy-duty bathroom cleaners
- Powder cleansers, cream abrasives, and scouring pads
- Steam mops, especially on cracked, poorly sealed, or older marble
- Generic soap-heavy cleaners that leave a dull film
“Natural” does not always mean marble-safe. A cleaner can be plant-based or pleasantly scented and still contain acids that etch stone. Check the label for pH-neutral, natural-stone-safe, or marble-safe wording before using it across the floor.
How to Clean Marble Floors Step by Step
1. Remove dust and grit first
Dry-clean the floor before introducing any liquid. Use a microfiber dust mop every day in busy areas, or at least several times a week in lower-traffic rooms. Vacuuming is fine when the vacuum is designed for hard floors and the wheels are clean.
Pay extra attention to entryways, kitchens, dining areas, and places where pets eat or sleep. A washable mat at exterior doors can reduce the amount of grit that reaches the marble in the first place.
2. Mix or apply a stone-safe cleaner correctly
If you are using a concentrated cleaner, follow the dilution instructions exactly. Adding extra product will not make marble cleaner. It usually creates residue, attracts more dust, and can leave a slippery finish.
For a ready-to-use spray, apply a light, even mist to a small section of floor or directly onto the mop pad. Do not flood marble tiles or allow cleaner to pool around grout lines, edges, or cracks. Marble is porous, and extended moisture can darken the stone or leave marks beneath the surface.
3. Mop in small sections
Work across the room in manageable sections, using gentle overlapping passes. The mop should be damp, not dripping. If it leaves visible water behind, wring it out more thoroughly.
Rinse or change the microfiber pad as it becomes dirty. Continuing with a gray, gritty pad simply moves soil around and increases the risk of fine scratches. On a large floor, switch to fresh water when the bucket starts to look cloudy.
4. Dry the floor for a clear finish
This final step makes a visible difference. Buff the floor dry with a clean microfiber towel or a dry mop pad, especially in areas where water tends to collect. Drying prevents water spots and helps reveal whether a dull patch is leftover residue, an actual stain, or etched marble.
Do not walk on the floor until it is fully dry. Wet marble can be slippery, and shoes or pet paws can leave new marks before the surface is clear.
How Often Should You Clean Marble?
The right frequency depends on traffic, pets, cooking activity, and whether the floor is near an entrance. Dry dusting is the most useful frequent task because it removes the particles that scratch marble.
For most homes, a light damp mop once a week is enough. Kitchens, foyers, and homes with children or pets may need spot cleaning as spills happen and a more complete wet clean two or three times a week. A guest bathroom with little use may only need a damp mop every couple of weeks.
More cleaning is not automatically better. Over-wetting the floor or using cleaner too often can build up residue. A simple, consistent routine wins over aggressive scrubbing.
Treat Spills Before They Become Stains
Marble gives you very little time with acidic or strongly colored spills. Coffee, wine, fruit juice, soda, tomato sauce, cooking oil, makeup, and pet accidents should be blotted immediately with a soft cloth. Do not wipe outward, because that spreads the spill across more stone.
After blotting, clean the area with a small amount of pH-neutral stone cleaner and a damp microfiber cloth. Then dry it completely. If an oily mark remains, it may have absorbed below the surface and need a stone-safe poultice treatment. Deep stains, rust marks, or discoloration around cracks are best assessed by a stone restoration professional rather than attacked with random household chemicals.
Etching is different from staining. A stain changes the color of the marble, while etching changes its finish. If a spot feels smooth but looks dull or lighter than the surrounding tile, an acidic product may have etched it. Cleaning will not restore that shine. Polishing or professional honing may be needed, depending on how deep the damage is.
Grout, Sealer, and High-Traffic Areas
Marble tile floors also have grout lines, which often collect dirt faster than the stone itself. Use a soft grout brush and a pH-neutral stone-safe cleaner. Avoid stiff bristles and aggressive grout bleach near marble edges, where splashes can cause permanent etching.
Most marble floors benefit from periodic sealing, but sealer is not a shield against every problem. It slows absorption and gives you more time to clean spills; it does not prevent scratches or acid damage. The schedule depends on the marble type, finish, traffic level, and the sealer already used. A simple water-drop test can help: if water darkens the stone quickly instead of beading for a short time, ask a stone-care professional whether resealing is appropriate.
In high-traffic zones, use rugs or runners with non-rubber, breathable backing. Rubber-backed mats can trap moisture and sometimes discolor stone. Shake out mats often, because trapped grit can still make its way onto the floor.
The Fast Fix for Dull-Looking Marble
If the whole floor looks hazy after cleaning, stop adding more product. First, rinse-mop lightly with clean water using a well-wrung microfiber mop, then dry-buff the surface. This often removes cleaner residue.
If the dullness remains in scattered spots, look closely. Uniform haze usually points to residue or hard-water deposits. Small, irregular dull patches near kitchens, dining tables, or bathrooms are more likely etching. That distinction saves money and prevents a frustrating cycle of trying stronger products that make the finish worse.
Keep a dedicated marble-safe cleaner, clean microfiber pads, and a dry buffing cloth where you store your floor supplies. When a spill happens, the right response is already within reach - and your marble gets to keep the polished, high-value look you bought it for.
Related Products
