










-50x50.png "ClearWhite GlassRestore Pro | Polish Cermin Kereta | Car Glass Polish Watermark and Water Spot Remover | Polish Cermin Hadapan | Kesan Wiper")


How to Restore Plastic Trim and Keep It Dark

A chalky gray bumper, faded mirror housing, or blotchy door trim can make an otherwise clean vehicle look neglected. Learning how to restore plastic trim is less about finding a miracle shortcut and more about removing the grime that masks the surface, then protecting the plastic from the sun, rain, and road film that caused the fading in the first place.
Most exterior trim is black when new because its pigments and oils are still intact. Over time, ultraviolet exposure dries the surface, while car-wash residue, wax, dust, and traffic film settle into its texture. The right process can bring back a deeper, cleaner finish without repainting every panel.
Why Black Plastic Trim Turns Gray
Exterior automotive trim takes more abuse than painted bodywork. It sits low on the vehicle, catches muddy water and road grime, and spends every day exposed to sunlight. Textured plastics are especially likely to look faded because dirt settles into their tiny grooves.
The gray appearance is not always permanent damage. Often, it is a combination of oxidation on the outermost layer and embedded contamination. That is good news: careful cleaning and a quality trim restorer can produce a visible improvement quickly.
Still, results depend on the condition of the plastic. Lightly faded trim usually responds well to cleaning and a protective dressing. Trim that has gone pale, feels rough, has white stress marks, or has been damaged by harsh chemicals may need repeated treatment or professional refinishing. A restorer improves appearance, but it cannot repair cracked or missing plastic.
What You Need Before You Restore Plastic Trim
You do not need specialist equipment, but preparation matters. Gather a pH-balanced car shampoo or all-purpose cleaner suitable for exterior surfaces, a soft detailing brush, microfiber towels, clean water, and a dedicated plastic trim restorer or protectant.
Choose a trim product made for unpainted exterior plastic. Tire shine, silicone-heavy dashboard sprays, and household oils may create temporary gloss, but they often attract dust, leave streaks, or wash away after the first rain. A purpose-made restorer is designed to darken faded trim while leaving a more even, durable finish.
Work in a shaded area on a cool, dry vehicle. Hot panels make cleaners dry too fast and can leave uneven product marks. If rain is expected, wait for a dry day so the treatment has time to set properly.
How to Restore Plastic Trim Step by Step
Start With a Deep, Safe Clean
Rinse the trim to remove loose dust and grit. Then apply your cleaner according to its directions and gently agitate the surface with a soft brush. Focus on textured areas around bumpers, wheel arches, roof rails, wiper cowls, door moldings, and mirror housings.
Do not scrub aggressively. Plastic trim can be tough, but harsh brushes and abrasive pads can create shiny scratches that stand out more than the fading. Use light pressure, especially around edges next to paint.
Rinse well and inspect the surface. If water runs off in dirty streaks or the towel picks up gray residue, clean it again. The goal is to remove old dressing, wax overspray, traffic film, and dirt before adding anything new.
Dry Every Groove and Edge
Drying is not an optional step. Water trapped in textured trim can dilute the restorer and create patchy dark spots. Wipe the area with a clean microfiber towel, then allow the vehicle to air-dry for a few extra minutes.
Pay close attention to seams, badges, door handles, and trim around windows. If needed, use the corner of a towel to pull moisture from tight spaces. Applying restorer to damp plastic is one of the most common reasons for streaky results.
Test the Product on a Hidden Spot
Before treating the whole vehicle, apply a small amount of trim restorer behind a mud flap, low on a bumper, or another less visible area. Check the color after a few minutes.
A good result should look darker and more uniform, not wet, greasy, or artificially shiny. If the product leaves a strong gloss, use less on the next application. Matte and satin finishes generally look more natural on factory plastic trim.
Apply Thin, Even Coats
Put a small amount of product onto an applicator pad or microfiber cloth rather than spraying freely across the vehicle. Spread it evenly over the trim, working one small section at a time. Follow the texture of the plastic and make sure the product reaches recessed grain without pooling in corners.
Thin coats are more effective than one heavy coat. Too much product can sling onto paint, collect dust, or leave greasy lines after rain. If the trim still looks uneven after the first coat has set, add a second light coat rather than saturating it.
Wipe any excess from painted panels, glass, headlights, and rubber seals immediately. Even a good trim dressing may leave marks if it dries on surfaces it was not designed for.
Let It Cure Before Driving
Check the product instructions for cure time. Many trim restorers need at least several minutes before buffing, while longer-lasting coatings may need a few hours away from water. Avoid washing the vehicle or driving through heavy rain immediately after application.
Once the product has settled, lightly buff high spots with a clean microfiber towel. This removes excess and helps create an even finish that looks refreshed instead of oily.
Avoid These Quick Fixes
A faded bumper can tempt you to use whatever is already in the garage. That can create more cleanup later. Avoid using engine oil, cooking oil, petroleum jelly, or permanent black shoe polish. These products can darken trim for a short time, but they do not provide reliable UV protection and may stain nearby paint or clothing.
Be cautious with heat guns, too. Heat can temporarily darken oxidized plastic by changing the surface, which is why the trick appears impressive in videos. But too much heat can warp the trim, create glossy patches, damage clips behind the panel, or cause irreversible discoloration. For most vehicle owners, a proper cleaner and trim protectant is the safer choice.
Also skip harsh solvent cleaners unless the label specifically says they are safe for automotive plastic. Strong degreasers can strip the surface further and make it harder for your restorer to look even.
How Long Does Restored Trim Last?
It depends on the product, climate, parking habits, and how often the vehicle is washed. A simple dressing may last a few weeks, while a more durable trim coating can last months when applied to a properly cleaned surface.
Vehicles parked outside every day will need more frequent maintenance than garage-kept cars. Strong sun, coastal air, road salt, and frequent automatic car washes all shorten the life of a treatment. The practical approach is to inspect the trim whenever you wash the vehicle. Reapply a light maintenance coat when the finish starts to look dry rather than waiting until it turns fully gray again.
Keep Plastic Trim Darker Between Treatments
Regular maintenance saves product and keeps your vehicle looking consistently cared for. Wash exterior trim with a gentle automotive cleaner, rinse away road film promptly, and avoid letting wax or polish dry on unpainted plastic. White wax residue is especially noticeable on textured black bumpers and moldings.
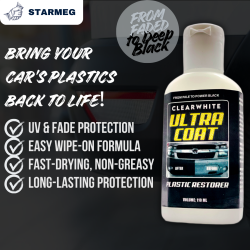
When using a trim protectant, select one with UV defense and a finish that matches your vehicle. A satin finish suits most modern cars, SUVs, and trucks because it restores depth without making factory trim look coated. Starmeg shoppers can look for vehicle-care treatments that clearly state exterior plastic compatibility, UV protection, and water resistance instead of choosing an all-purpose shine spray.
If you use your vehicle for family trips, pet transport, work runs, or regular outdoor parking, add trim care to your normal wash routine. A few minutes spent cleaning and protecting the plastic before it becomes severely faded is far easier than trying to revive it after years of neglect.
When Restoration Is Not Enough
Some trim has passed the point where a dressing can create a lasting improvement. Deep scratches, chalky white oxidation that returns within days, cracked surfaces, and peeling factory coatings may call for trim dye, refinishing, replacement, or professional repair.
That does not mean you should give up on maintenance. Even replacement trim benefits from proper cleaning and UV protection from day one. Treat restoration as part of vehicle care, not a one-time cosmetic rescue. Clean plastic, a thin even coat, and regular protection will keep the darker finish looking right long after the first application.
Related Products

-250x250.png "ClearWhite GlassRestore Pro | Polish Cermin Kereta | Car Glass Polish Watermark and Water Spot Remover | Polish Cermin Hadapan | Kesan Wiper")